This fun event was planned as a fundraiser for our high school musical and took place before the Saturday evening performance of Shrek the Musical. The idea was to get kids excited about seeing the musical and to make a little money at the same time.

The event was advertised on the musical posters, in the local paper , social media and word of mouth. Tickets were $5 and could be bought pre-sale or at the door.

When kids arrived they were greeted and given their "Quest Card." The greeters briefly explained that the kids needed to complete each of the 10 "challenges" on the card in order to finish the quest and find out if they were a prince, princess or Ogre. After they completed a specific challenge the volunteer would put a mark in the box on their card next to that challenge Once they completed the entire card they could take it to "The End" for a treat.

The Quest Cards were separated into "boys" and "girls" because on the back there was a "scratch off" section for the big reveal (prince, princes or Ogre). So to discretely show a difference between the girls card (princesses) and the boys card (princes) I punched a little flower in the top right corner of the girls cards.
Once inside the gym the kids could go to the challenges in any order.
Freak - Flag Frenzy

Here the kids made their own "Freak -Flag" to wave during the Let Your Freak Flag Fly song in the musical. I was on a pretty low budget, so I cut flag shapes out of old wallpaper and duct taped them to shish kabob sticks. The kids had plenty of foamy stickers and ribbon to personalize their own flags.


Gingerbread Taste Test

Kids decorated their own gingerbread shaped sugar cookie. Yes, I made all the cookies!
Canned frosting, mini m&m's, chocolate ships, and plenty of sprinkles were provided.


Bug Hunt Balloon Bash

At this challenge the kids had to pop a balloon without using their hands in order to get a little plastic bug out of the balloon. The day before the event I had some of the choir students help blow up the balloons, sticking a bug in each one and I stored them in black bags until the Swamp Party.

Blind Mice Memory Game

This was basically a giant memory game. The kids had to match 2 of the same picture. The pictures were just coloring pages of different characters from Shrek the Musical. I laminated all the cards so they would withstand lots of flips and turns.


Sword Fight Landing

For this challenge I provided "log stumps" that the kids stood on to have a "sword fight" with a fellow quest participant. Only foam swords were used and I had an adult supervising to make sure things didn't get out of hand.


Meet & Greet with Donkey

Yes, the kids got to go meet the "REAL" donkey!

We had a donkey that was standing just outside the back doors of the high school gym. There was a sign on the gym wall that read "Far, Far Away" pointing in the direction of the donkey. A friend brought her 25 year old donkey for the kids to pet, feed and get their picture taken with. It was perfect!

The donkey was held on a leash at all times and there was plenty of adult supervision..

Donkey from the musical even came out to meet the "real" donkey.
Shrek's Swamp Buffet

For this challenge the kids had to reach their hand into a large can
and feel Shrek's "swamp food." If you have ever done this activity during Halloween, you know it is always a fun, yet scary thing for kids to do.

Here is what was in the cans:
Fish eyes - capers
Dried flies - raisins
Bat wings - beef jerky
Worms - cooked pasta tossed in olive oil
Toad brains - cauliflower rubbed w/ a little olive oil
Bunny ears - dried apricots
Rat tails - whole green beans

Hot Lava Moat Cross

So this idea was fun to develop into reality. The school already had a two piece bridge in their prop collection, so my son built a "wobbly bridge" out of old fire hoses and wood slats. Then my husband attached the wobbly bridge to the two bridge ends. We placed support "beams" between the two bridge ends so they wouldn't move. Then added red and orange netting and a fog machine to give the feel of a hot lava moat.

It worked perfect. The bridge had a little wobble when the kids crossed. I only wish the fog machine would have been more powerful, but perhaps the size of the gym made it seem like the fog was a little light.
Swamp Hop Obstacle Course

During this challenge the kids had to complete a mini obstacle course.
They began by grabbing their "hobby horse" and galloping with it down to the "cave". The caves were just large tile tubes we had on the farm. Probably not something most people have, so you will have to improvise. Perhaps a large box could work.

....on the other side of the cave they had to go under the "log fence" ....

.....then hop from log to log across the swamp......

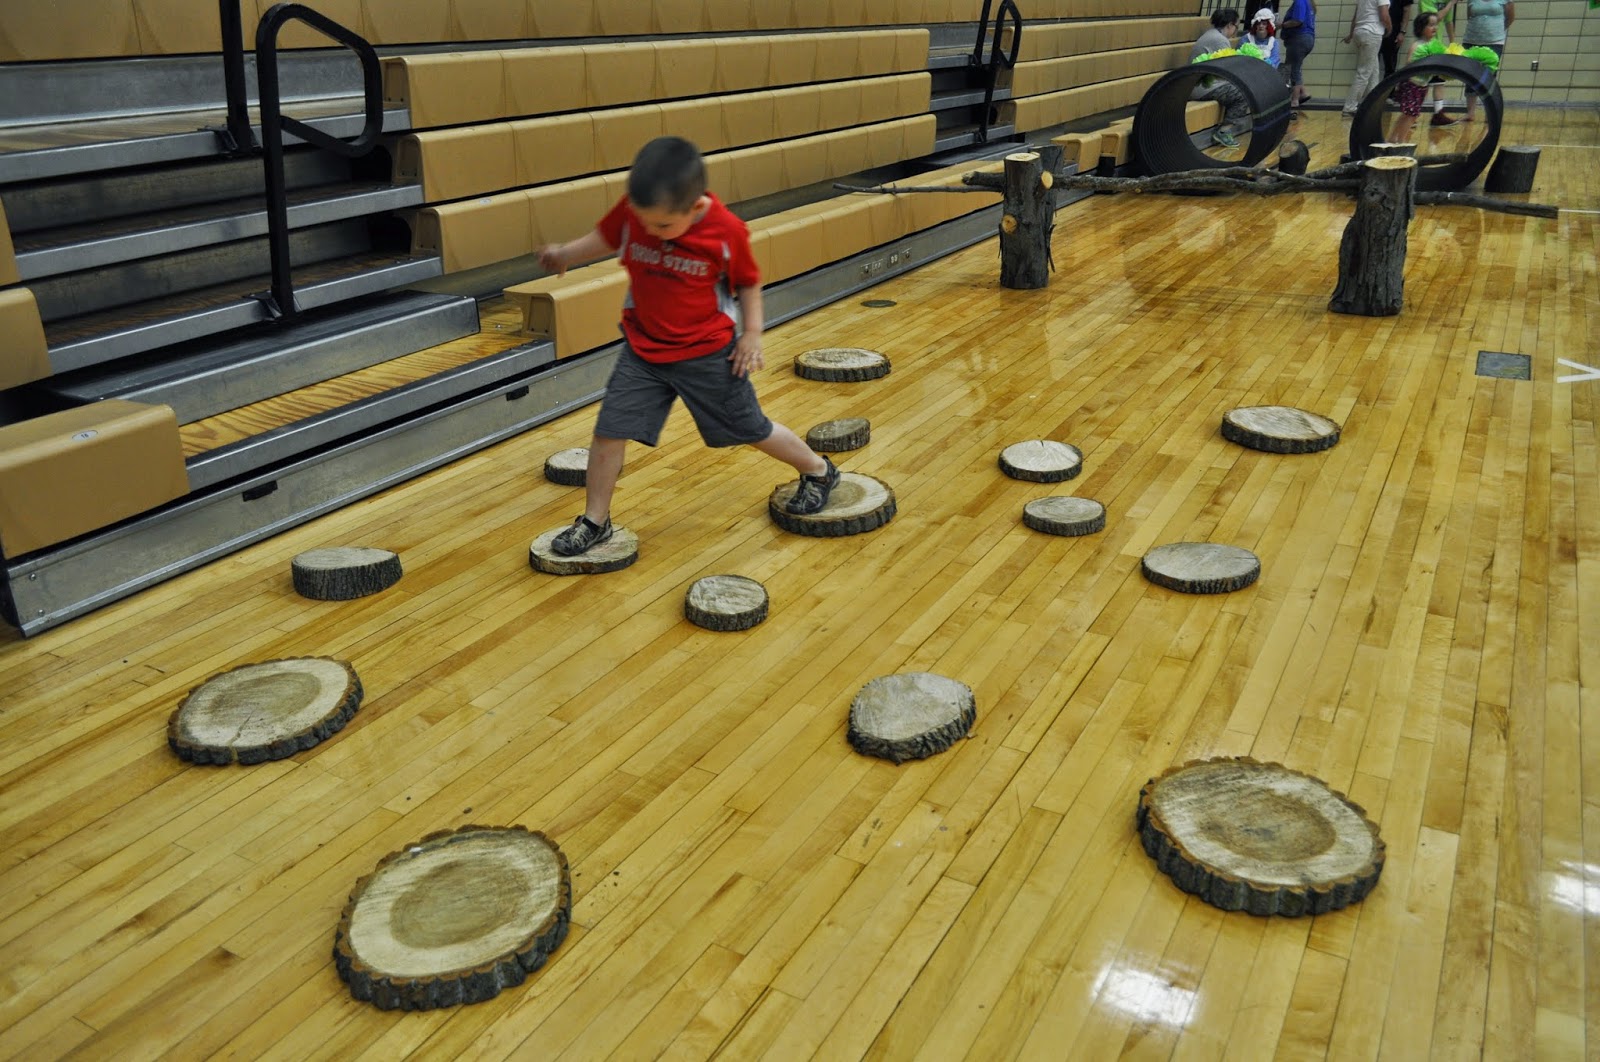
...and finally under the giant cobweb.

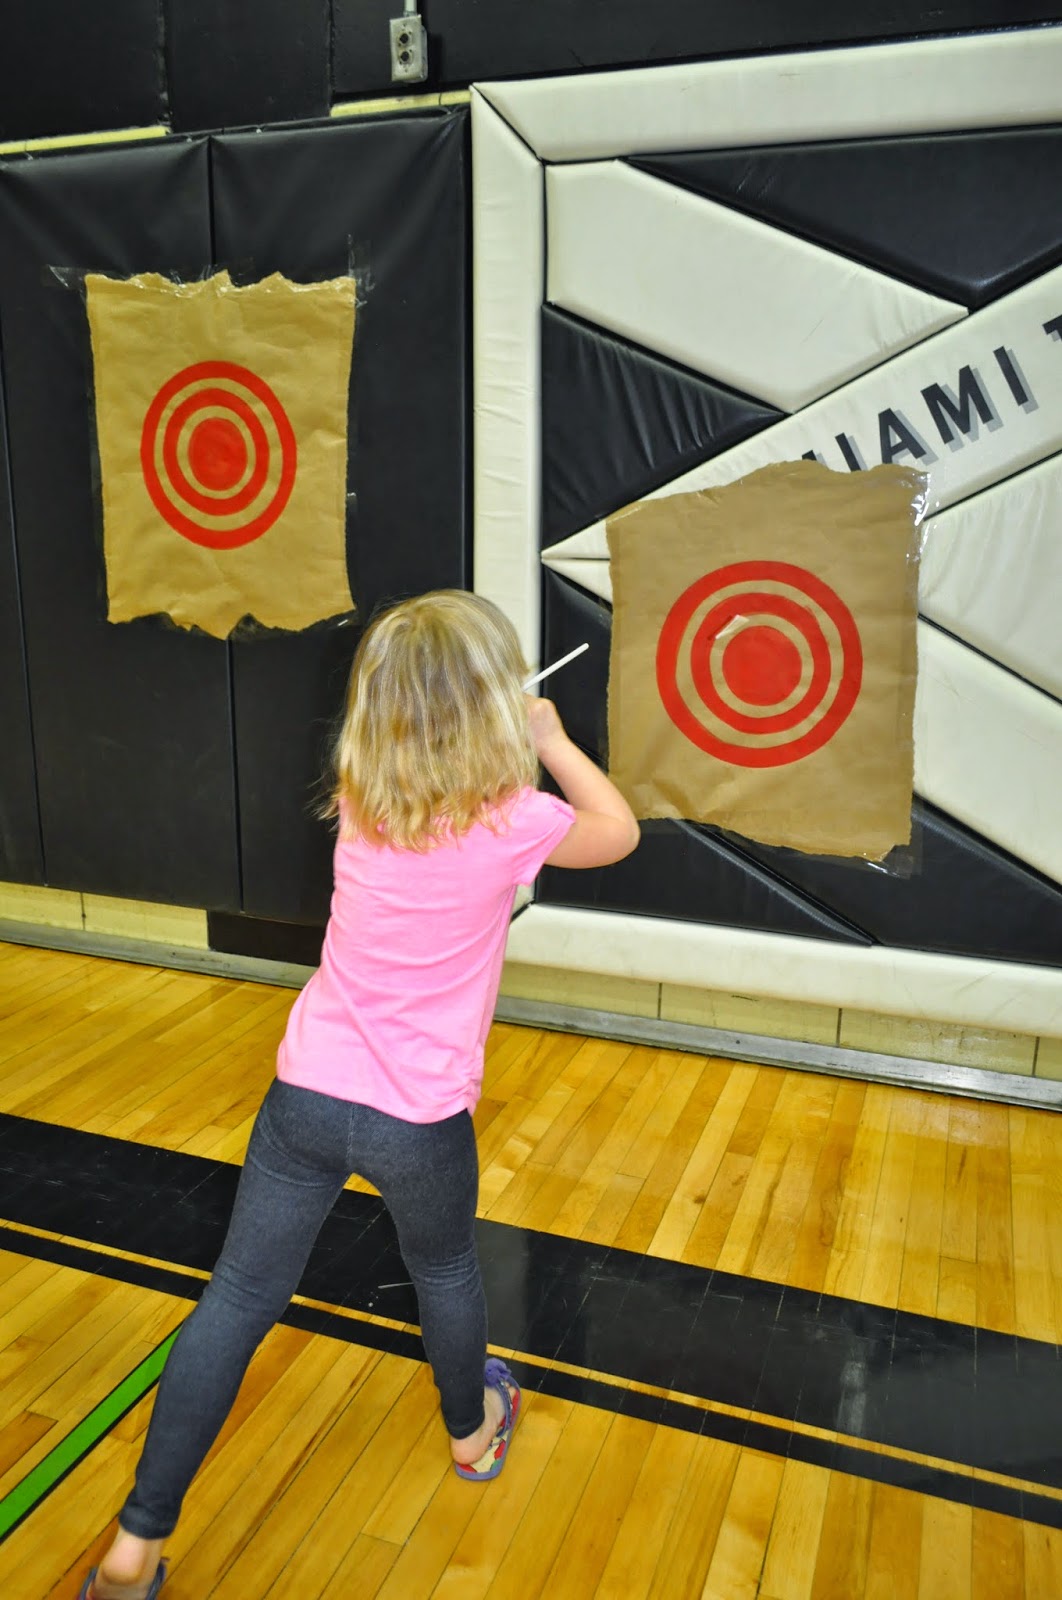
Huntsmen's Challenge

This challenge had two activities. First the kids had to try and hit the target using
a "blow dart" ( a Q-tip blown through a straw)

Then they tried their hand at getting a "spear" through a hole in the net.
The "spears" were old pieces of PVC pipe we had on the farm. I covered them with green duct tape and glued a piece of foam pipe insulation on the ends. The net was the baseball teams practice net so it already had the hole in it.

- The End -
So once the kids completed all 10 of the Quest Challenges they took their card to "The End" table where they scratched off the back to reveal if they were a prince, princess or Ogre. We decided not to have anyone be an Ogre, just in case it might make someone upset.
This is what the back of the cards looked like. Just like a lottery ticket scratch off.
This is what the back of the cards looked like. Just like a lottery ticket scratch off.

To do this I first printed a crown (prince) or a tiara (princess) on the back.


I then covered the crown/tiara with a piece of clear packaging tape. To make the scratch off ink I mixed together 1 part dish soap and 2 part metallic acrylic paint. I painted over the clear tape making sure to cover the crowns. It took 2 coats, but once they were totally dry, they could easily be scratched off with a penny.

Once they kids found out if they were prince or princess they were given a book mark with the "Rules of Being a Prince" or the "Rules of Being a Princess" on it.
The Rules of being a Prince
Say “Please” & “Thank you.” Brush your teeth
& comb your hair. Offer your seat to a
lady. Always tell the truth.
Say you are
sorry. Admit when you are wrong. Open the door for
others. Don’t use
swear words. Be kind
to others. Work
hard. Always do
your best.
Use your
manners. Respect
others. Stand
up straight. Hug & kiss your mom
& dad. Keep your promises. Use your imagination. Help others in need. Show compassion. Dream big. Be grateful. Try new things. Know you are loved. Share everything with everyone. Never give up. Have fun.
***************
The Rules of Being a Princess
Clean your room. Be
nice to everyone.
Share your toys. Say
“please” & “thank you”. Listen to your parents. Be kind & loving. Forgive others. Say your prayers. See the good in everything. Say
you are sorry.
Have good manners.
Don’t complain.
Always do your best. Give hugs & kisses. Laugh
& giggle.
Dream big dreams.
Help with chores.
Learn something new
every day.
Be patient & kind. Don’t
be afraid to sparkle.
Play dress up. Have tea parties. Wish upon a star. Believe in yourself. Have a happy
heart.
****************
As a reward for participating in Shrek's Swamp Party Quest and completing all their challenges the kids received a cone of green cotton candy.

A little plastic bug was placed on top of the cotton candy. If I had to do it again I would have bought candy bugs because we had to tell everyone not to eat the bugs. Live and learn!

Character Photo Ops
Throughout the Swamp Party characters from the musical were available for photo ops and to visit with the kids. We felt this would help some of the kids not be afraid of the characters when they saw them on stage.


The Shrek Swamp Party was a great success but would not have been possible without the help of lots of volunteers.


